
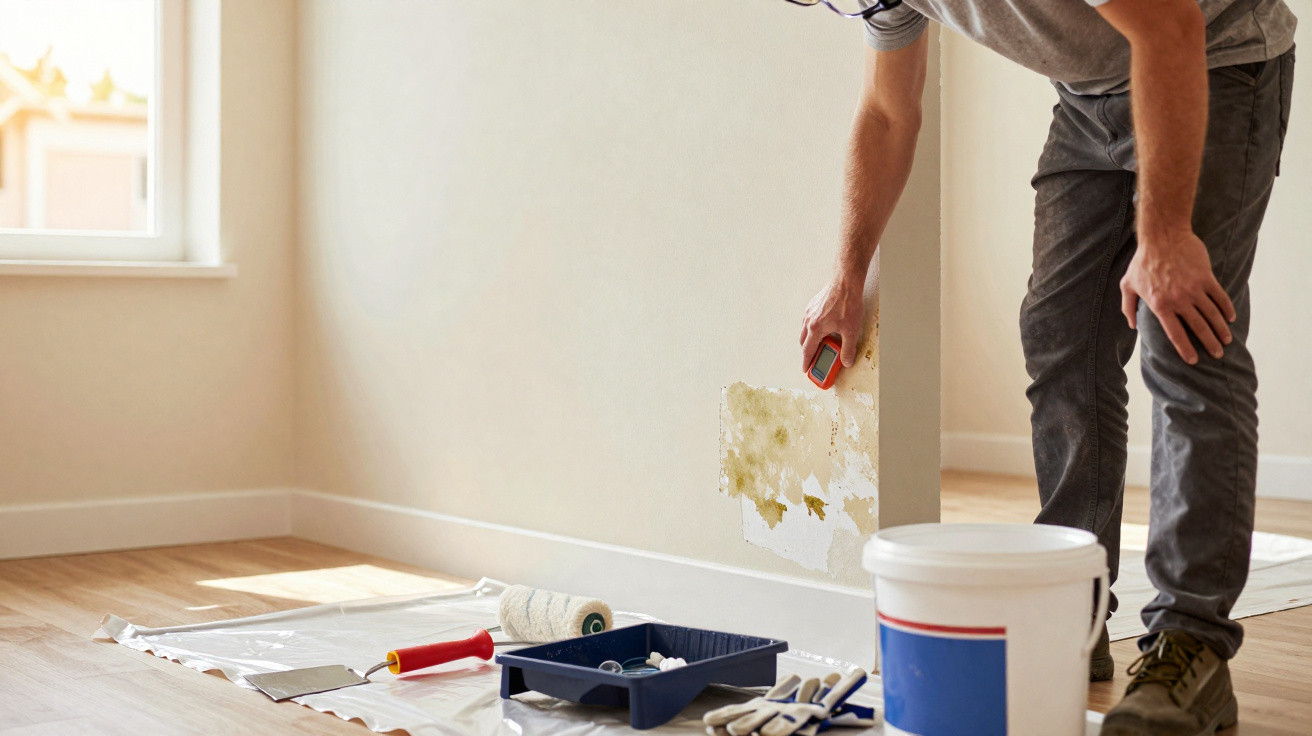
Damp on a wall often begins as no more than a small stain. Over time, however, it can cause the plaster to blister, paint to peel and the surface to become powdery or “eaten away”. Rather than being merely an aesthetic nuisance, damp indicates that part of the building is allowing water to penetrate or excessive vapour to build up. This is increasingly common in 2026, owing to denser developments, ageing façades, worn installations and inadequate ventilation.
What causes damp on internal and external walls?
Specialists generally divide the causes of damp in walls into three main categories: water penetration, rising damp and condensation. Water penetration occurs when moisture enters from outside, whether through rain getting into cracks in façades, flat roofs, poorly sealed joints or leaks in concealed pipework. It is often accompanied by swollen plaster or plaster that sounds hollow when tapped.
With rising damp, moisture travels upwards from the ground because there is no suitable damp-proof barrier. It typically creates a horizontal band near the skirting board, often with whitish salt deposits. Condensation, meanwhile, is caused by internal vapour from hot showers, cooking or drying clothes, combined with insufficient airflow. It is particularly common in cold corners, behind cupboards, and in bathrooms and kitchens.
Watch a video on the Mestre do Acabamento YouTube channel explaining how to permanently deal with rising damp and walls with peeling paint caused by moisture:
How can you correctly identify the type of damp on a wall?
Establishing the source of a wall with damp is essential if the repair is to last. Stains that consistently appear in the same place, especially near stop valves or plumbing columns, may point to a leak. Damp bands rising evenly from floor level suggest rising damp, whereas recurring mould during colder periods is usually a sign of condensation.
The following signs can help with this assessment and may indicate that more extensive professional work is required:
- A lingering musty smell or dark fungal growth in corners.
- Paint that repeatedly “blisters” and plaster that crumbles when touched.
- Marks that return even after several coats of paint.
- Localised damp appearing soon after heavy rainfall or extensive shower use.
How do you treat damp on a wall step by step?
Once the cause has been identified and issues such as roofing defects, faulty pipework or poor ventilation have been addressed, the repair can be carried out in straightforward stages. First, cover the area with dust sheets, ensure there is good airflow, and wear gloves, safety glasses and a mask, particularly where mould or heavy dust is present. Then remove every loose material, including flaking paint, poorly bonded filler and hollow sections of plaster.
Once the substrate has been exposed, brush the surface to remove salt deposits and dust. Mouldy sections should be treated with a suitable specialist product, allowing the required contact time. The wall must then dry naturally, using cross-ventilation, dehumidifiers or gentle heating, before applying a stabilising primer, repair mortar, sanding and finally paint designed for damp-prone rooms. In bathrooms, kitchens and utility rooms, paint containing an anti-mould additive is preferable.
Which materials, tools and precautions ensure a good result?
When the substrate is solid and dry, strengthen it with sealers and repair mortars suited to either internal or external use. Apply these in thin layers and allow them to cure properly to prevent cracking. On old, highly porous walls, a stabilising primer can help bind the substrate, provided all deteriorated material has first been removed.
Useful tools that make the job easier and improve the longevity of the repair include filling knives, scrapers, a hammer and bolster chisel, brushes, sandpaper, plastering trowels, floats, rollers and paintbrushes. Observing each product’s drying time, avoiding rushed repainting and maintaining at least a basic routine of ventilating rooms are practical measures that prevent repeated remedial work and help keep the wall in good condition for longer.

Comments
No comments yet. Be the first to comment!
Leave a Comment