
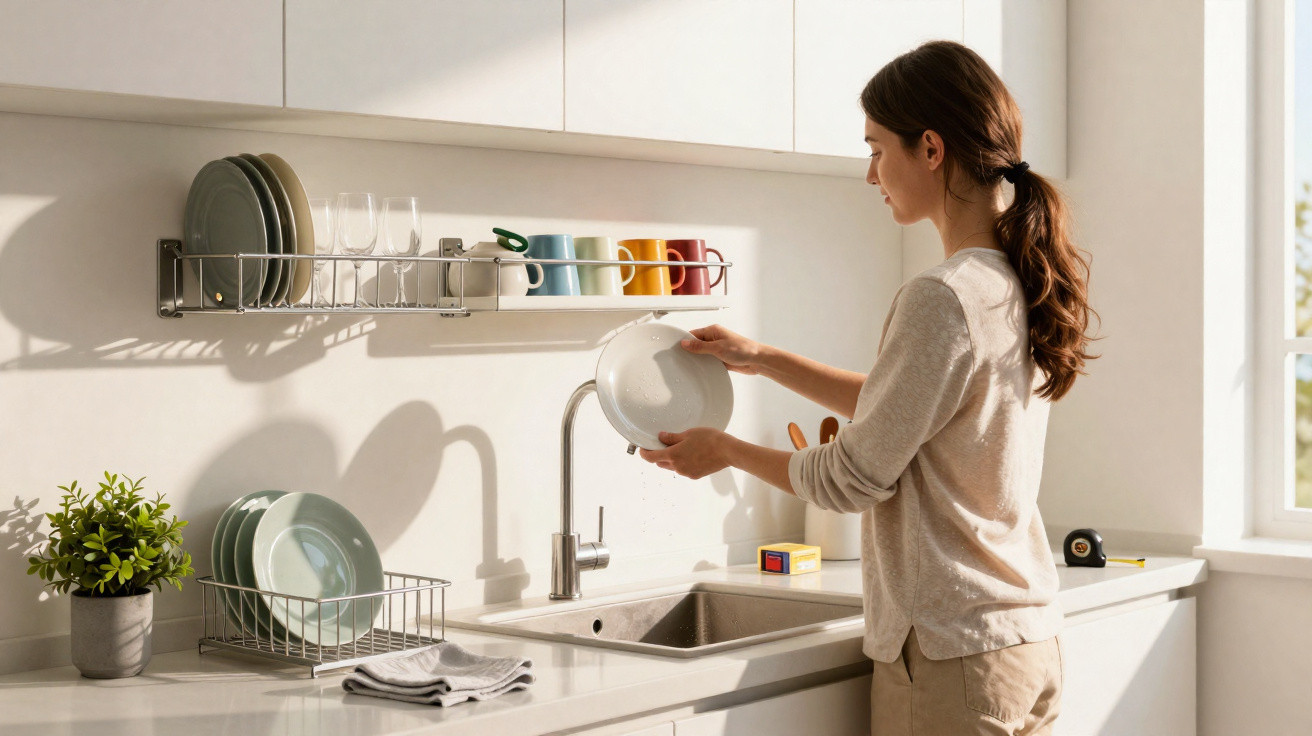
The answer is not beside the sink, but above it.
Many households face the same issue every day: a traditional draining rack takes up precious worktop space, water marks appear everywhere, and the kitchen never looks truly tidy. A new development tackles the problem where space is at its tightest – not by adding more accessories, but by taking a completely different approach to drying plates, glasses and cutlery.
Why the traditional draining rack is becoming increasingly frustrating
For decades, the conventional draining rack has done its job without complaint. Yet in modern kitchens, where every centimetre matters, its shortcomings are becoming increasingly obvious.
- Constant dampness: Water collects in the drip tray or directly on the worktop. This can cause water marks, swollen joints or, in the worst case, mould in corners nobody wants to see.
- A cluttered look: Half-clean plates, upside-down mugs and a jumble of cutlery – a draining rack often resembles a building site that never goes away. The washing-up area never feels properly finished.
- A space-hog: Particularly in small kitchens, a draining rack occupies valuable room you would rather use for chopping, setting things down or plating food.
- A cleaning trap: Food residue, grease and limescale build up between the bars. Without regular cleaning, it quickly becomes an unhygienic lump sitting in the middle of the worktop.
It is hardly surprising that many people are looking for alternatives better suited to small city flats, open-plan kitchens and minimalist interior styles.
“Less stuff on the worktop does not mean less convenience – it means using space differently.”
The new solution: a wall-mounted draining rack
The current kitchen trend simply moves the draining area up a level. Instead of placing the rack beside the sink, it is fitted directly to the wall – above or alongside the sink.
The principle is straightforward: the worktop remains clear, dishes air-dry, and water drips where it belongs – back into the sink.
How a wall-mounted draining rack works
A typical design has one or several baskets or tiers fixed to a rail or mounted directly on the wall. Plates, bowls, glasses and mugs are placed in it as usual, but above rather than on the worktop.
- Clever use of space: In many kitchens, the area above the sink is entirely unused. A wall-mounted rack turns this dead space into storage.
- Improved drying: Air can circulate around the dishes and water can drain away freely – reducing moisture and, in turn, bacterial growth.
- A calmer appearance: Depending on the model, dishes are partly concealed within the shelf or behind a rail. This looks far tidier than a bulky rack on the worktop.
“Modern wall-mounted draining racks combine a dish dryer, shelf and organiser in one single element.”
The key benefits at a glance
- More worktop space: The sink area stays clear, allowing you to chop vegetables, put down baking trays or place bowls without constantly working around a draining rack.
- Fewer puddles: Many wall-mounted models channel water straight into the sink. Puddles on the worktop and trickles running over the edge are eliminated.
- Better hygiene: There is no stagnant water in trays or bowls, reducing the risk of germs and unpleasant odours.
- High capacity: Quality systems can easily hold up to 10 kilograms of dishes – enough for stacks of plates, glasses and mugs for an entire family.
- Easy maintenance: Many baskets can be removed and cleaned separately. Limescale and grease are easier to remove than from bulky freestanding models.
- A visual upgrade: Stainless-steel-look or matt-black metal and clean lines can look genuinely stylish, giving the kitchen a more modern feel.
Which wall-mounted draining rack suits your kitchen?
Before choosing the first model you see, it is worth taking a close look at your kitchen and everyday habits.
Step 1: Find the right location
- Measure the wall area above or beside the sink carefully.
- Check whether wall cupboards, pendant lights or sockets are in the way.
- Remember that plates need to be easy to load and unload, so avoid fitting it too high.
In very small kitchens, mounting it in an alcove or directly beneath a wall cupboard can also work well, as long as water can drain into the sink without difficulty.
Step 2: Choose the size and capacity
- Single-person or couple household: A slim model with one tier for plates and a small basket for cutlery is usually enough.
- Family with children: Wider two-tier systems are ideal here, possibly with an additional holder for cups and breakfast bowls.
- Infrequent cooking, frequent dishwasher use: A compact model designed mainly for glasses, knives and chopping boards is often sufficient.
Step 3: Consider materials and build quality
Strong, practical materials make all the difference:
- Stainless steel: Rust-resistant, durable and visually compatible with many taps and appliances.
- Hard plastic: Lightweight, often more affordable and available in a range of colours. Look for good build quality so that nothing cracks.
- Powder-coated metal: It has a modern appearance, but the coating should be of good quality to prevent rust spots.
“Anyone who saves on material quality often pays later with rust marks, wobbly baskets and frustration when cleaning.”
Installation: drill or stick?
Many systems offer two fixing options: the traditional method using wall plugs and screws, or strong adhesive strips or pads.
| Installation method | Advantages | Disadvantages |
|---|---|---|
| Drilling | Very secure, high load capacity, long-term solution | Holes in tiles, more effort required for installation |
| Adhesive fixing | Quick, no drill holes, ideal for rented homes | Lower load capacity; adhesion depends on the surface and adhesive quality |
If you intend to load the rack heavily on a regular basis – for example, with weighty ceramic plates – screw-fixed systems are generally the safer choice. Adhesive systems can be enough for light use or as a temporary option, provided the manufacturer's stated load capacity is followed.
Is making the switch really worthwhile?
For many households, replacing a standard draining rack with a wall-mounted version brings noticeable relief. This is especially true for people with limited worktop space, open-plan kitchens within living areas, or a preference for clear, uncluttered surfaces.
Anyone who cooks daily and washes up a lot by hand benefits above all from:
- greater freedom of movement when preparing meals
- fewer damp patches around the sink
- a kitchen run that looks calmer and less cluttered
The situation is different if almost everything goes into the dishwasher and washing up by hand is only occasional. In that case, a small folding model on the worktop may be sufficient. The wall-mounted draining rack trend is primarily aimed at people whose sink is in constant daily use.
Practical tips for everyday use of a wall-mounted draining rack
A few simple routines will help ensure the new solution does not become a problem area itself:
- Clean baskets and shelves at least once a week with washing-up liquid and a soft brush.
- Remove limescale marks with a little vinegar water, then rinse thoroughly and wipe dry.
- Store sharp knives separately in a knife block to avoid the risk of injury when loading and unloading.
- Position glasses so that they stand securely and cannot knock against one another.
If you organise the system a little – keeping plates, bowls, mugs and cutlery in the same places each time – you will find what you need more quickly and avoid unstable stacks.
More order without new appliances
What is interesting about this trend is that it requires no expensive electrical appliances, major alterations or technical gimmicks. A thoughtfully planned wall-mounted draining rack makes better use of existing space and addresses an everyday issue that many people have long accepted as inevitable.
If you are planning a new kitchen or currently modernising one, consider the area above the sink deliberately. Even in an existing kitchen, a wall-mounted rack can usually be retrofitted without difficulty – and a single element can noticeably change the feeling of order and spaciousness in the kitchen.



Comments
No comments yet. Be the first to comment!
Leave a Comment