
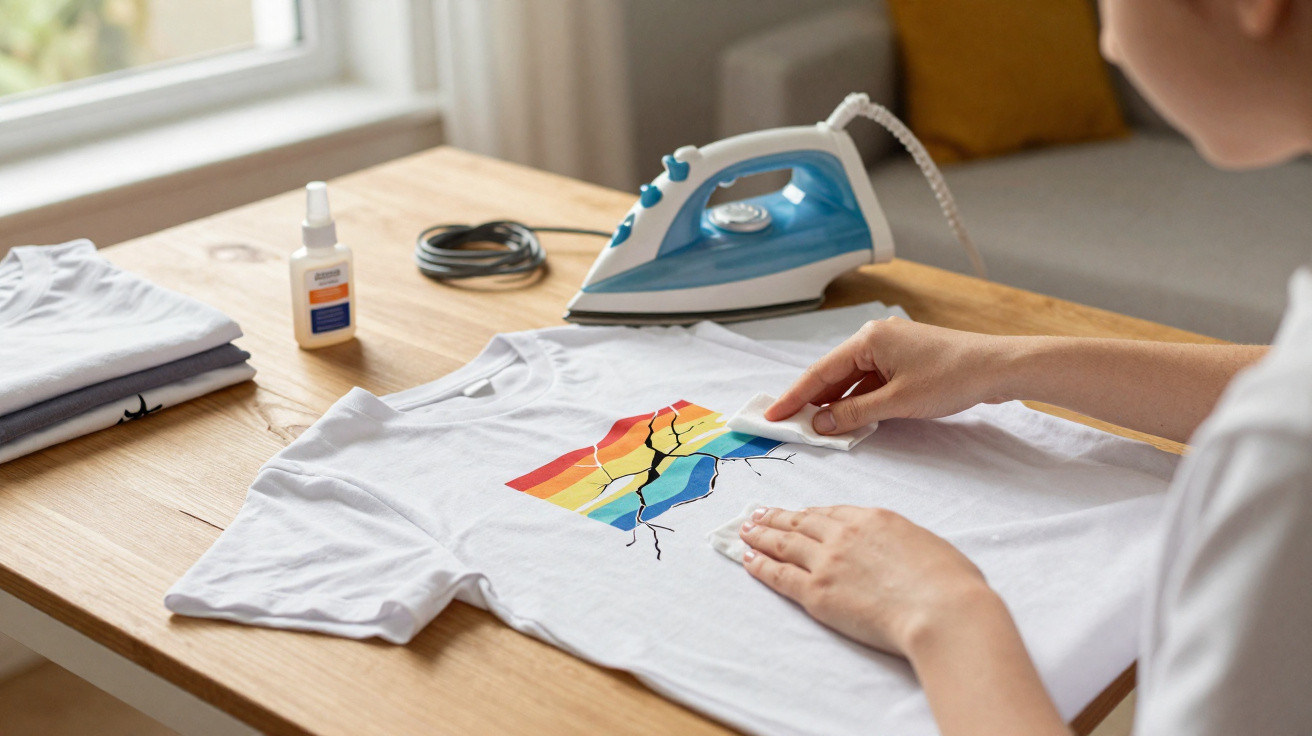
Many T-shirts end up in textile recycling bins even though the fabric itself is still perfectly sound; it is only the print that has started to crack. This is where a remarkably straightforward trick comes in, one that has been circulating on online forums and DIY groups for some time. Using an everyday bathroom product and an ordinary iron, brittle prints can be visibly smoothed and reinforced. The shirt will not look factory-new, but it can often be restored well enough to wear with pride again.
Why great T-shirts are discarded because of damaged prints
Almost everyone knows the situation: the T-shirt fits brilliantly, the material is soft and the memories attached to it are priceless - yet the large print across the front begins splitting into fine lines. This particularly affects:
- Band and festival T-shirts
- Sportswear and club clothing with a large logo
- Merchandise from television series, games or films
- Promotional T-shirts with thick lettering or graphics
The reason is the printing method. Many designs use a type of plastic or vinyl layer applied to the fabric. That layer stretches and moves far less than the material beneath it during wear and washing. Over time, this creates tension, causing the print to harden and start cracking.
“The fabric often remains in excellent condition - only the print gives away the shirt’s age.”
As a result, many people throw away usable clothing simply because its print has seen a few years of wear. Yet this ageing effect can sometimes be partly reversed.
The unexpected solution: acetone from the bathroom
The principle behind this trick is to soften the brittle print slightly, then smooth it again with heat. A product many people already keep in the bathroom is suitable for this: acetone, often found in nail varnish remover. Important: choose a version that lists acetone among its ingredients.
Acetone can attack plastics when used heavily and in large quantities. Here, however, it is used in the opposite way: small, controlled amounts only soften the print’s surface a little. When heat is then applied, the material can bond together more effectively again and the visible cracks can partly close.
For this repair attempt, you will need:
- A T-shirt with a cracked print but undamaged fabric
- Acetone or acetone-based nail varnish remover
- Cotton pads or a piece of cotton fabric
- An iron
- A thin cotton cloth or clean tea towel to use as a protective layer
Step by step: smoothing a damaged T-shirt print
1. Prepare the work area and check the material
Lay the T-shirt flat on an ironing board or a solid table, smoothing it out carefully. The print should be as crease-free as possible. Before beginning, carry out a quick test: use a lightly moistened cotton pad to apply a little acetone to an inconspicuous edge of the design, then watch whether the colour immediately dissolves or bleeds. If nothing dramatic happens, you can cautiously extend the treatment.
2. Soften the design carefully with acetone
The amount used is the key point: the cotton pad should be damp but never dripping. The aim is to treat only the surface of the print, rather than soaking the entire fabric.
- Moisten the pad with a small amount of acetone
- Gently squeeze out any excess
- Lightly dab the cracked print rather than rubbing it
Dabbing helps prevent fragile sections from tearing away completely. Instead, the material gradually becomes more flexible. Applying too much pressure or rubbing vigorously may cause parts of the design to lift off altogether.
“Less is more here: it is better to dab lightly several times than make the print too wet in one go.”
Once the surface feels slightly softer and the cracks appear less sharply defined, it is time to move on to the next stage.
3. Add a protective layer and use the iron
Before bringing in the iron, place a thin cotton cloth or clean tea towel over the print. This protective layer serves several purposes:
- It stops the print from sticking to the iron.
- It spreads the heat more evenly.
- It lowers the chance of shiny marks or scorching.
Set the iron to a medium temperature and switch off the steam. Place it briefly and carefully over the covered design. Avoid rapid movements; instead, use slow, gentle passes. As the softened print warms up, it starts to level out, and fine cracks visibly draw closer together.
After a few seconds, lift away the iron, briefly raise the cloth and check the result. The print should look smoother, without smudged colour or fabric that appears shiny from burning. Repeat the process in short stages if necessary.
When this method is worthwhile - and when it is not
This trick has limits. In some situations, it is more likely to cause damage, for example where:
- the print is already peeling away over large areas
- the colour has developed clear holes
- the fabric itself is badly stretched out or thin
- the design uses highly delicate specialist finishes, such as sequins, hairy flock printing or metallic effects
The method is most useful for conventional flat screen prints and vinyl prints that have only fine cracks and remain stable overall. In these cases, it can often make a major visual difference - the vintage look remains, but the shirt looks less “fallen apart”.
How to make your repaired T-shirt last longer
Once a design has been smoothed with acetone and an iron, it should be treated a little more gently in future. A few simple habits can help preserve the effect for longer:
- Always turn the T-shirt inside out before washing
- Avoid very hot washes; 30°C is ideal and 40°C should be the maximum
- Do not use a tumble dryer, as it puts heavy stress on prints
- Choose liquid detergent instead of harsh powders containing bleach
- Do not cram T-shirts with large prints into an overfilled washing machine
These steps reduce the chance that the newly smoothed print will immediately stretch or split again. The fabric moves more gently, while the repaired surface stays stable for longer.
Risks, safety and sensible alternatives
Acetone is highly flammable and may irritate the skin. Anyone trying this method should therefore take several safety measures seriously:
- Work in a well-ventilated room
- Avoid contact with the eyes and mucous membranes
- Wear thin gloves if you have sensitive skin
- Keep the acetone bottle tightly closed and out of children’s reach
If you would rather avoid any risk, there are other options. Some laundries and textile printers will inspect old designs and can either reprint them or professionally remove the existing print so that the shirt can later be printed again. For especially treasured items, this may be a worthwhile investment.
What really happens with acetone and screen printing
Acetone is an organic solvent. Many plastics react to it by swelling slightly at the surface, and this is exactly the property used by the T-shirt trick. Screen printing, including Plastisol and vinyl printing, forms a relatively thick layer sitting on top of the textile. When that layer is briefly softened and then pressed together with heat, the broken edges move closer to one another.
Deeper cracks will not disappear completely. For everyday wear, though, the overall appearance is often what matters: when the white crack lines are less noticeable, an old print can quickly make a T-shirt suitable for regular use again - significantly extending its lifespan.
Ultimately, this is about more than appearance. Every piece of fabric saved conserves the resources, water and energy needed to make new clothing. Keeping textiles in use for longer with tricks like this protects not only your budget, but also the environment to some extent.

Comments
No comments yet. Be the first to comment!
Leave a Comment